Perspex Boat Windows
Replacement Boat Windows, Wash Boards and Hatches. 
Let the sunlight into your cabin with replacement Perspex Plastic boat windows, wash boards and hatches.
Perspex Panels provide a low cost, fast delivery on replacement boat windows, wash boards and hatches.
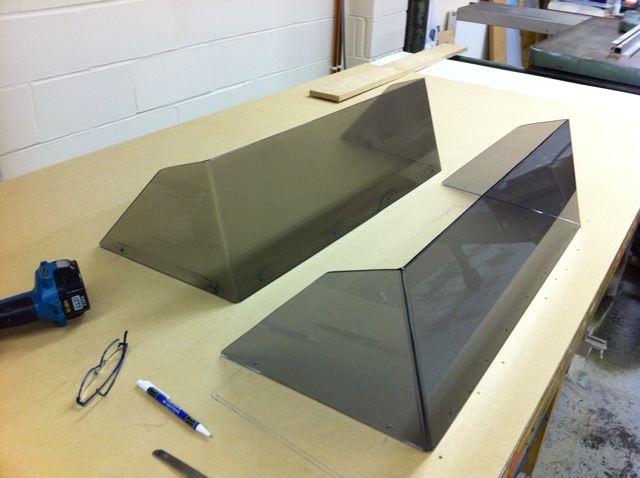
Perspex Acrylic is the preferred choice for replacement boat windows, usually in tinted Perspex, but often in clear too. Replacement Perspex boat windows will last for many years. We are able to cut to your specific shapes from drawings, templates or simply pop your existing boat windows into us for us to profile and copy. We can provide drilled and countersunk holes, we can polish, chamfer and bevel boat window edges. Most importantly, we work with you to provide the replacement boat window of your choice. You no longer have to endure cracked and crazed windows or hatches.
Replacement Perspex acrylic Hatches and Perspex acrylic washboards can also be replaced in the same way as replacement boat windows.
3mm clear and tinted Perspex Boat Windows
4mm clear Perspex Boat Windows
5mm clear and tinted Perspex Boat Windows
6mm clear and tinted Perspex Boat Windows
8mm clear and tinted Perspex Boat Windows
10mm clear & tinted Perspex Boat Windows
Perspex tinted acrylic available from Perspex reference codes of 950, 952, and 951.
We have manufactured replacement boat windows for many boats including; Sunseeker, Fairline, Dory, Bayliner, Pinton, sailing boats, day boats, Boston Whaler, Glastron, Shetland, fishing boats, Sea Ray, Wellcraft, Mastercraft, Bowrider, Avon Inflatables, Westerley, Dufour, Microplus, Corribee, Macwester, Mirage, Centaur, Henshaw, Zodiac, Valiant, and Moody
Hints for Replacing Boat Windows
For further information and help, please phone Tiffany or Dave on 0844 504 9277 or email at [email protected]. Samples of replacement boat window tinted Perspex available upon request.
Click here to download the 'hints for replacing boat windows' file
Hints for Replacing Boat Windows.
Courtesy of 'The Plastic Spork'.....
'Replacing or installing new windows can revitalize the look of your boat. Years of environmental battering, cleaning and polishing can take a toll on your windows.
Can you repair or polish out faded or scratched windows? Sometimes, but first you must determine what type of windows you have. Most windows are made from either clear or smoked acrylic. Typically these windows will be fixed or in frames and many are curved or formed.
There are two types of plastic materials: The first is methyl-methacrylate more commonly known as acrylic. Familiar brand names are Plexiglas, Acrylite, Perspex, Lucite etc. It is the most common because it is easy to handle, easy to thermoform and has a relatively hard surface that can be polished.
Second is polycarbonate. It is most commonly known as Lexan, Hyzod, Makrolon, Tuffak etc. It is thought to be bullet proof and extremely tough. This is true but polycarbonate is a softer plastic that bends or yields when under extreme conditions. Under certain conditions when an object impacts the polycarbonate it either bounces off or it penetrates the material but will not shatter. Unfortunately, the impact usually leaves a visible mark or dent and since polycarbonate is soft it also scratches very easily. It is difficult to polish polycarbonate because it just becomes hazy the more you rub it. Motorcycle windscreens and hockey visors have a special hard coating sprayed on which makes it much more durable but once a scratch does happen it is better to leave it alone than try to polish it out.
Tempered glass is also used to make windows. Typically tempered glass is used for front flat windows and is usually mounted in smaller sections and typically framed with a rubber gasket. Tempered glass is very durable (automobile windows), and is a must where windshield wipers are used. When tempered glass cracks or breaks it usually breaks into small pieces. Overall if your windows are made of acrylic you may be able to polish them out but if they are polycarbonate or tempered glass they will probably have to be replaced.
Polishing out existing acrylic windows
The exterior of Acrylic windows can be polished out if the acrylic is fairly new or in like new condition but if there are a few fine scratches you can polish them out by using a liquid polish such as 3M Finishing Compound or other polishes that are 10,000 grit or higher. You must use lots of water on a sponge pad using an electric rotary polisher. (car polisher) You can also use a machine glaze or hand glaze polish. Glazes are wax based polishes that can hide small scratches but glazes will only temporarily hide the scratches and once the glaze wears off it will need to be repolished.
Sizing the window
Acrylic has a high degree of thermal expansion. This means that when the temperature changes the acrylic will expand or contract accordingly. Acrylic expands 0.00014/inch/degree Celsius. Therefore over 48the window can expand ¼from 0°C to 30°C. When sizing the window you should allow for this expansion and especially if the windows are to flush mounted they should be sized with a gap around the edge of the window. We do not recommend the use of screws as a permanent way of fastening a window to a boat since the screws will quite often hinder the natural expansion of the window and may cause the window to buckle.
Using an adhesive caulking
Adhering the window to the surface of the boat. There are some basic steps to make sure that you have a successful and leak proof window installation.
The preparation:
Test the fit of the windows and keep the windows masked with a covering so they do not get scratched or get any adhesive on them.
It is important to have the window ready to install before you start with the adhesives. Now that you have sized the window you must position the window on the boat where it is to be installed. You will need to mark 4 to 6 hole positions around the window for fastening the window to the boat while the adhesives cure.
Sometimes if possible using wooden blocks or some other device it is handy to have a positioning guide to make it easier to align the screw holes during the installation of the window. This is not absolutely necessary but is sometimes helpful. Mark the holes evenly spaced around the window and remember the screws are only being used to hold the window while the adhesive is curing. If the window is slightly curved and you need to apply pressure on the window to make it curve you will need 6 screw positions one set in the centre and one set on each end . If that is not enough force to cause the window to curve it means that the adhesive will also not hold the curvature. Typically windows that require more than .25change in curvature over 48 should be thermoformed to reduce the surface stress and springback.
To drill the holes in the acrylic you will need to put a piece of hard wood behind it to prevent the drill from cracking the acrylic as the drill gets to the bottom of the hole. Typically use a #8 screw with a 3/16diameter hole and washer. Remount the windows carefully and using smaller drill bit (1/8diameter), drill pilot holes in the boat surface using the holes in the window as your guide. Try to drill the holes in the centre (sometime by using a 3/16 drill) and just touching the surface of the boat will provide a centre mark to guide the 1/8 drill bit. Note: ( plastic drill bits are available for soft plastics that allow fast plunge speeds and reduce chip wrap. A 60 degree point and flat-face rake provides an ideal plunging point. The point reduces the stresses introduced into the hole walls and imparts a fine finish without clouding or crazing in the wall of the hole).
Once the holes are drilled you will need a ¼ spacer that will insure that there will be an adequate amount of adhesive between the window and the boat surface. Most caulking is designed to flex left to right proportion to the thickness of the caulking bead. Therefore if you squish all the caulking out between the window the adhesive will not flex but it will tear when stretched. The ¼spacer can be a ¼length of tubing, either plastic or rubber. Using the #8 screws try putting the screws in the boat surface without the windows and then remove them before priming the surface.
The most successful adhesives we have used have been a two part primer and adhesive method. And we will use this method to demonstrate a window installation.
The primer insures that the adhesion between the adhesive and the primer is certain. Some plastics and metals will have different surface conditions which may not have the best surface for the adhesive to adhere. The primer is usually like paint and is applied with an applicator or brush. The primer is usually black in colour and allows a clean visual installation. It is recommended that you prime a neat even stripe around the window and the boat surface where the adhesive will be applied. The area to be primed should be masked off with tape to make a clean line around the edge of the window and the corresponding area on the boat surface. Before applying the primer make sure the surface is cleaned using rubbing alcohol. Then apply the primer to both the boat and the window and let it dry as per the instructions. Now remove any of the masking that cannot be removed after the window has been installed.
We are now ready to apply the caulking and it will be applied to the boat surface and try to apply the caulking towards the end of the day when it is cooler and dryer or on a cooler day. This allows the caulking to be less runny.
Using the ¼spacers mount the screws and the spacers to the side of the boat around all the windows. These screws may not be suitable for reuse so have extra screws available for fastening the windows.
Caulk and install one window at a time to reduce the risk of getting dirt between the window and the boat surface and also it will insure that you can concentrate on one window at a time.
Using a caulking gun apply the caulking around the middle of the 1wide primer strip. Try to make the bead about ½wide x ½thick and make sure the bead is continuous around the perimeter. When you get to the screws and washers carefully put a bead on both sides and with a toothpick push the adhesive on and around the washer but try not to get it on the screw.
Now remove the screws and place the window over the opening and insert the screws into the holes. Do not worry if the washers have moved and are not aligned with the holes because they will still do what they are supposed to do.
Now tighten the screws gently until you feel the windows are pushed down to the washer height.
Repeat this for all the windows.
Let the windows cure for at least 12 hours then you can prepare for the finish caulking. Do not remove the screws for at least 24 hours and try to keep the windows from too large a temperature differential until the screws have been removed. If the windows are going to be in the sunlight for more than a few hours the masking tape glue may leave a residue and therefore the windows should be covered with a sheet or the tape carefully removed. The windows will have a gap around the perimeter and this should be taped off and caulked neatly around the window. After at least 24 hours you can remove the screws in the windows. Now tape off the area around the holes and open up the holes by using a drill or knife. Then inject the caulking into the holes and wipe off the excess. Wait a few hours and remove the tape. Your windows are now installed and sealed.'
PerspexPanels offer a delivery sevice to the following towns and cities:
Bournemouth, New Forest, Poole, Ringwood, New Milton, Lymington, Lyndhurst, Verwood, Ferndown, Blandford, Wareham, Weymouth, Dorchester, Swanage, Fordingbridge, Salisbury and The Isle of Wight, Aberdeen, Abergavenny, Andover, Antrim, Armagh, Aylesbury, Banbury, Barnsley, Barrow-in-Furness, Basildon, Basingstoke, Bath, Bedford, Belfast, Derry, Berwick-upon-Tweed, Birmingham, Blackburn, Blackpool, Bognor Regis, Bolton, Bracknell, Bradford, Brighton & Hove, Bristol, Bromsgrove, Burnley, Bury, Bury St Edmunds, Burton-upon-Trent, Canterbury, Carlisle, Cambridge, Cannock, Canterbury, Carmarthen, Chelmsford, Cheltenham, Chester, Chichester, Colchester, Corby, Coventry, Crawley, Croydon, Crewe, Darlington, Dartford, Derby, Doncaster, Dover, Dudley, Dumfries, Dundalk, Dunstable, Durham, Dundee, Dunfermline, Eastbourne, East Grinstead, Eastleigh, Fleetwood, Edinburgh, Ellesmere Port, Evesham, Exeter, Falmouth, Fareham, Folkestone, Galashiels, Gateshead, Glasgow, Gloucester, Gosport, Great Baddow, Guildford, Harlow, High Wycombe, Halifax, Harrogate, Hastings, Hereford, Huddersfield, Huntingdon, Immingham, Inverness, Ipswich, Kendal, Kettering, Kidderminster, Kilmarnock, Kings Lynn, Kingston-upon-Hull, Lambeth, Lancaster, Leamington Spa, Leeds, Leicester, Lichfield, Lincoln, Liverpool, London, Lowestoft, Luton, Maidenhead, Maidstone, Manchester, Middlesbrough, Milford Haven, Milton Keynes, Montrose, Newcastle-upon-Tyne, Newbury, Newmarket, Newport, Northampton, Norwich, Nottingham, Nuneaton, Oxford, Pembroke, Penzance, Perth, Peterborough, Plymouth, Poplar, Portsmouth, Preston, Reading, Redditch, Ripon, Rochdale, Rotherham, Rugby, Runcorn, Salford, Salisbury, Scarborough, Scunthorpe, Sheffield, Shrewsbury, Skelmersdale, Slough, Southampton, Southend-on-Sea, Stafford, Staines, Stevenage, Stirling, Stratford-upon-Avon, Stockport, St Albans, St Helens, Stoke-on-Trent, Sudbury, Sunderland, Swansea, Tamworth, Taunton, Telford, Tewkesbury, Torquay, Truro, Tunbridge Wells, Wakefield, Walsall, Warrington, Watford, Warwick, Wells, Wembley, Westminster, Widnes, Wigan, Winchester, Windermere, Woking, Worthing, Wolverhampton, Worcester, Yeovil, York
Delivery serice also available to all counties including:
Avon Bedfordshire, Berkshire, Borders, Buckinghamshire, Cambridgeshire, Central, Cheshire, Cleveland, Clwyd, Cornwall, County Antrim, County Armagh, County Down, County Fermanagh, County Londonderry, County Tyrone, Cumbria, Derbyshire, Devon, Dorset, Dumfries and Galloway, Durham, Dyfed, East Sussex, Essex, Fife, Gloucestershire, Grampian, Greater Manchester, Gwent, Gwynedd County, Hampshire, Herefordshire, Hertfordshire, Highlands and Islands, Humberside, Isle of Wight, Kent, Lancashire, Leicestershire, Lincolnshire, Lothian, Merseyside, Mid Glamorgan, Norfolk, North Yorkshire, Northamptonshire, Northumberland, Nottinghamshire, Oxfordshire, Powys, Rutland, Shropshire, Somerset, South Glamorgan, South Yorkshire, Staffordshire, Strathclyde, Suffolk, Surrey, Tayside, Tyne and Wear, Warwickshire, West Glamorgan, West Midlands, West Sussex, West Yorkshire, Wiltshire, Worcestershire
Usful Links:
Business Directory - attract the right results with Businessmagnet the online directory
iDorset - Dorset's online directory